PREFER A FREE QUOTE FOR MEASURE & INSTALL?
Steps
Determine your lock side
Measure the width
Measure heights
Measure lock
 Make your own deductions
TRACKING
Our doors have industry standard top and bottom rollers, you must have suitable tracking to accommodate these rollers. Please contact us if you are unsure if your track is suitable, as we do not offer returns if your tracks are not compatible.
SUITABLE TRACKING
 Top H Track - Sliding
 Top Sliding Track
 Top Track - U Channel
 BOTTOM PIP TRACK
 UNSUITABLE TRACKING
Note: Even if your tracking is pictured below there are still options to install a sliding screen door; take photos, give us a call and we'll endeavour to find the simplest solution.
 Wunderlich hanging top track
 Arrowhead bottom track
 Cold room hanging track
 Unsure? Call for help
Two Measure Options are available:
Option 1: Measure your existing screen door
Measuring from an existing screen door: If you have an existing door, and you are happy with the fit then we suggest that you measure this door and use these measurements for your new door.
Door Widths: Measure the top, middle and bottom widths of the screen door; send us the largest of the three measurements.
Door Height: Measure from top to bottom of the screen door on both the left and right hand sides; send us the shortest of the two measurements.
Lock Height: You can use the existing lock height if desired; first make sure that the new handle will not interfere with the existing glass door handle, do this by referring to the Lock Above & Lock Below instructions at the bottom of the page. Then measure from the bottom of the existing screen door up to the centre of the existing striker, this will be the centre of the new striker and screen door handle.
Option 2: Measure from the tracks for a new door
Door Widths (with receiving interlocks) : Measure from the point where the lock striker will be mounted into the receiving channel (1.1) to the outside edge of receiving interlock attached to the fixed glass panel (1.2).
 1.1
1.1 1.2
1.2
No Receiving Interlock?
Option 1. Substitute the frame interlock for a bug seal this will eliminate insects coming from the through the gap between the door and fixed panel - indicate this change when placing your order. Frame Interlocks are supplied with all Seconline Sliding Security Screen Doors; 7mm Diamond doors are not security doors and are supplied with a side bug seal.
Option 2. Purchase and install a receiving interlock; use the instructions below to ascertain what size receiving interlock you require and then select it from the list of Addons at Step 3 of the Product Builder.
Door Width (without a receiving interlock): If there is no receiving interlock and you elect to have a bug seal, measure to the back, glass side of the fixed panel (1.2).
 1.2
1.2
Door Height: Measure lengths at three to four points along the track; take this measurement from the top of the bottom track, to the bottom of the top track, deduct 12 mm from the shortest length and record this measurement. Your track will either have a raised rail (1.3) or it will be a flat U-shaped section (1.4).
If a variation of more than 4 mm exists this may result in the door not sliding properly, and additional tracking may have to be installed to make tracks parallel.
 1.3
1.3 1.4
1.4
Frame Interlocks
Frame Interlocks are supplied with all Seconline security rated sliding screen doors; the purpose of interlocks is to lock the back of the sliding door into the fixed panel simultaneously as the door locks into the receiving channel on the wall side, this ensures that the door is locked on both sides.
A frame interlock (1.5) is fixed to the back of the sliding door at the point of installation, when the door is moved into the locked position this frame interlock will connect/interlock with the receiving interlock (1.6) which is located on the fixed glass panel.
 1.5
1.51.6
No Receiving Interlock?
If you decide to purchase and install a receiving interlocks use the guide below ascertain what size receiving interlock you will require to suit your tracking then select this interlock as an Addon at Step 3 of the Product Builder.
Measuring for a Receiving Interlock
If your doors do not have a receiving interlocks on the fixed glass panels and it is necessary for you to install them there are three different sized receiving interlocks:
 Interlocks
Identifying precisely which receiving interlock is most suitable to your doors can be done using the following methods:
If the distance from the centre of the bottom track to the face edge of the fixed glass panel frame (1.7) is greater than 20 mm then a 7 mm offset interlock is required.
If the distance from the centre of the bottom track to the face edge of the fixed glass panel frame (1.7) is less than 20 mm and greater than 16 mm then a 3 mm offset interlock is required.
If the distance from the centre of the bottom track to the face edge of the fixed glass panel frame (1.7) is less than 16 mm then a flat interlock is required; if you find that you require a flat interlock you must add 10 mm to the width of each screen door.
 1.7
1.7Lock Height: Take your lock measurement from the top of the bottom track, to the centre of where you want your lock handle. This will also be the centre of middle lock striker.
This measurement needs to be a minimum of 120 mm above the top of your existing solid door lock (1.8) or 60 mm below the bottom of your existing door lock handle (1.9).
THE LOCK SIDE IS DETERMINED FROM THE OUTSIDE LOOKING IN
 1.8
1.81.9
 Make your own deductions
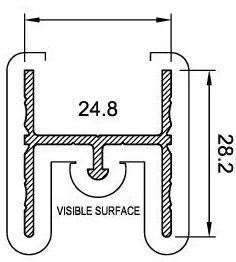 Top H Track - Sliding
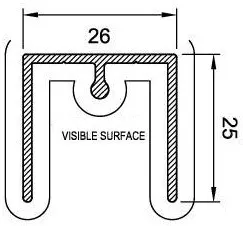 Top Sliding Track
 Top Track - U Channel
 BOTTOM PIP TRACK
  Wunderlich hanging top track
 Arrowhead bottom track
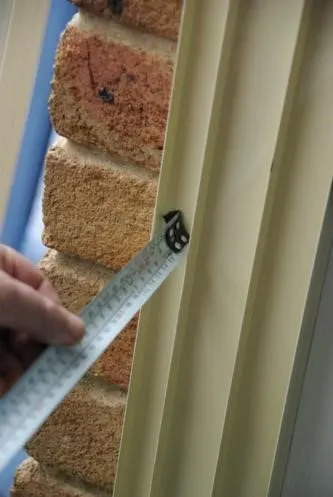 1.1
1.1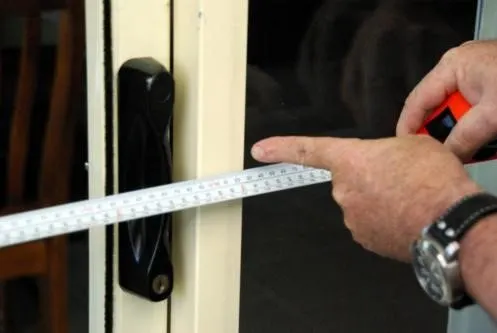 1.2
1.2 1.2
1.2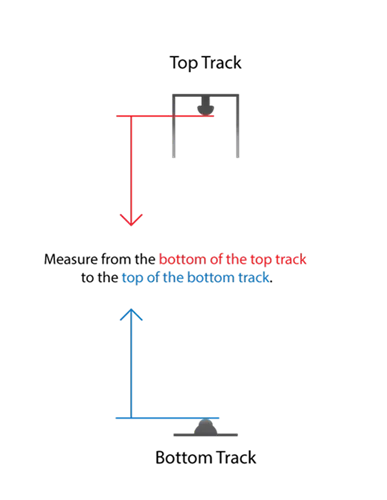 1.3
1.3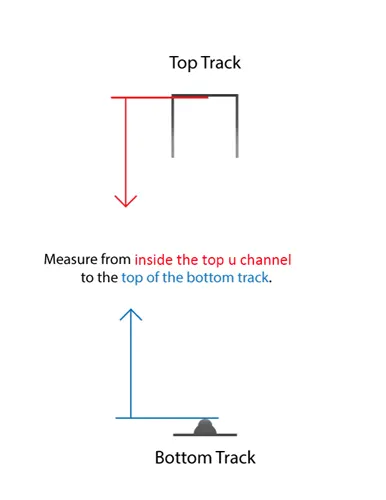 1.4
1.4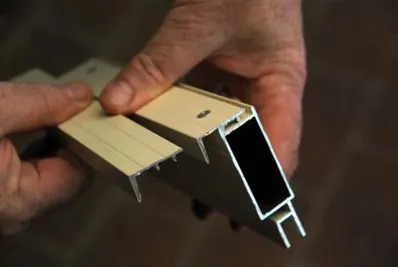 1.5
1.5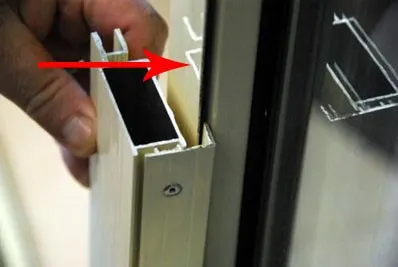 1.6
1.6 Interlocks
 1.7
1.7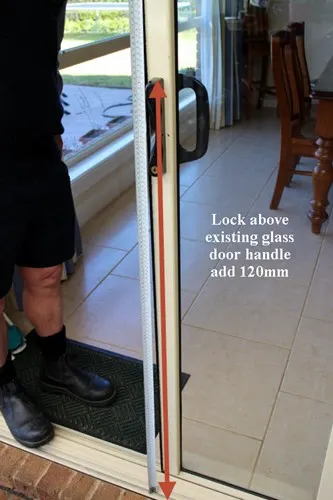 1.8
1.8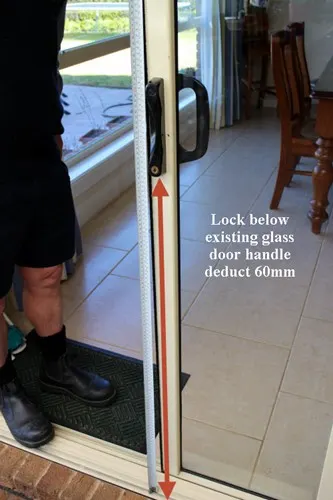 1.9
1.9